How to Point Name Servers from Godaddy to The Golden Arts Hosting?
In our earlier post How To Point Nameservers from Namecheap to The Golden Arts Hosting, we displayed how easy it is to point a domain from any domain registrar to The Golden Arts Hosting by simply changing your Domain Nameserver. However, many users who are not technical find it hard to follow the instructions without a clear screenshot of the domain registrar that they’re using. So we decided to create a easy to follow blog that will detail how to point a domain from GoDaddy to your Golden Arts Hosting account.
So why point your nameserver from GoDaddy to The Golden Arts Hosting in the first place? Well, the answer is quite simple. You may have already purchased a Domain via Godaddy but you like the high speed performance and tailor made service that comes with one of our cloud web hosting plans. So you simply want to use your pre-purchased domain name from Godaddy with our web hosting plan to take advantage of the hosting performance and/or service with us.
Step 1
The obvious thing is to start by purchasing a Golden Arts cloud web hosting plan. You can do so by clicking here and then scrolling down to our pricing plans and then clicking “Order Now” on the plan of your choice. If you’re just starting out with a single website and you have no future plans of adding another site you may want to consider just going with the Cloud Bronze plan. However if you think it’s very likely that you’ll have multiple websites in the future then go with our Silver Cloud plan. This is the plan that we recommend to most of our clients. All of our plans comes with Raid 10 SSD, Free SSL and LiteSpeed.
Next, follow the checkout process all the way through, make sure your email address is correct to. During the checkout, you will be prompted to create a account. Be sure to write down and remember your login credentials.
Step 2
Now the moment that you’ve been waiting for! After you’ve purchased hosting and created an account as summarized in step one, it’s now time to point your Nameservers to your hosting account.
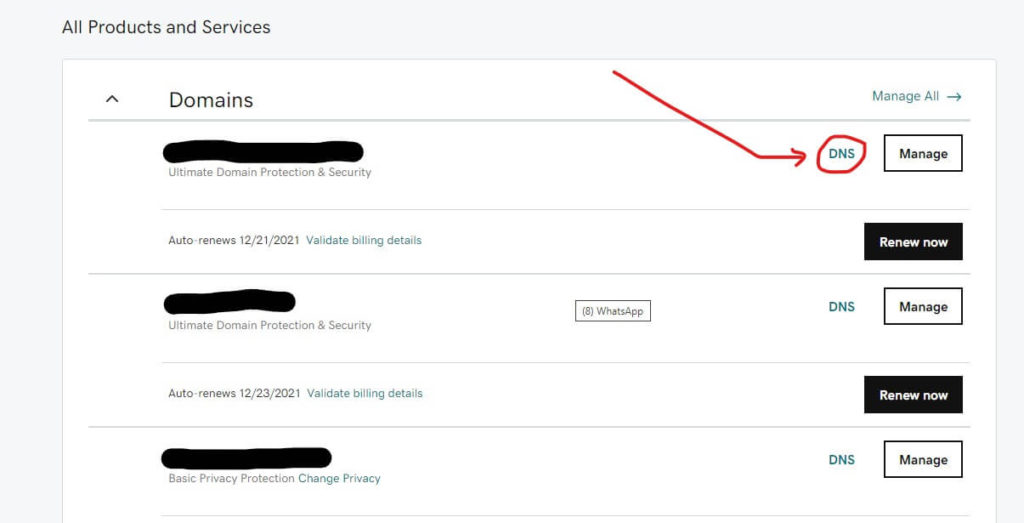
Log in to your GoDaddy account, go to your Product section and within the “Domains” section select the domain you wish to point to your hosting account.
Here you’ll see a “DNS” or “Manage DNS” button like in the screenshot below, click on it.
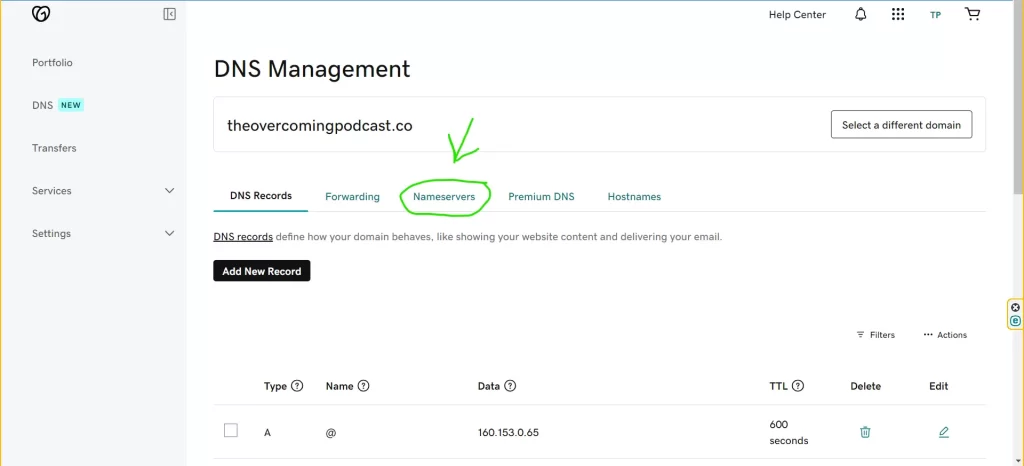
Now on the next screen select the “Nameservers” tab.
Then click the button “Change Nameservers“.
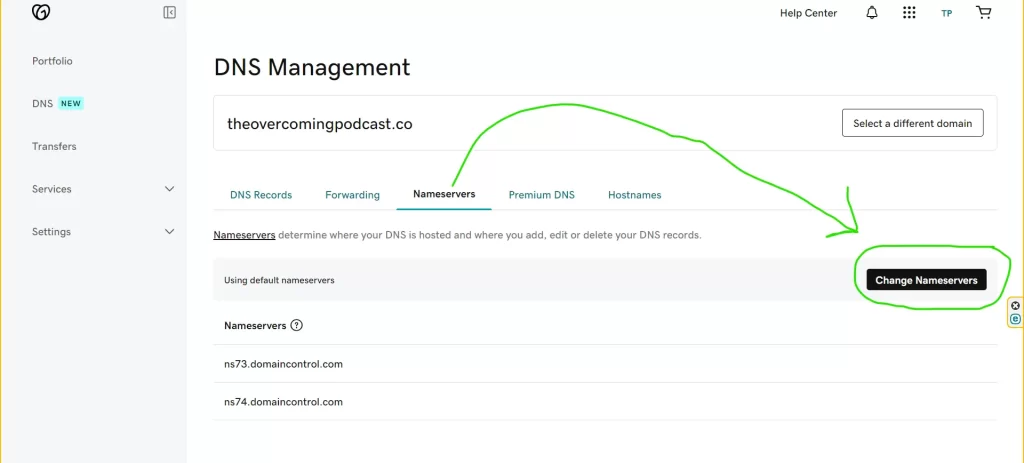
Here you’ll see your GoDaddy default nameservers:
ns73.domaincontrol.com
ns74.domaincontrol.com
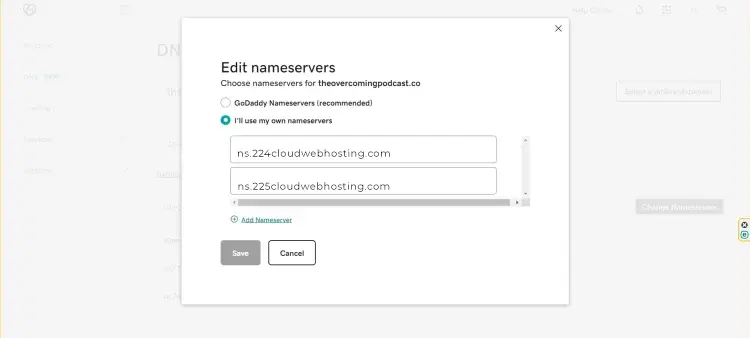
However, you want to select “I’ll use my own nameservers“.
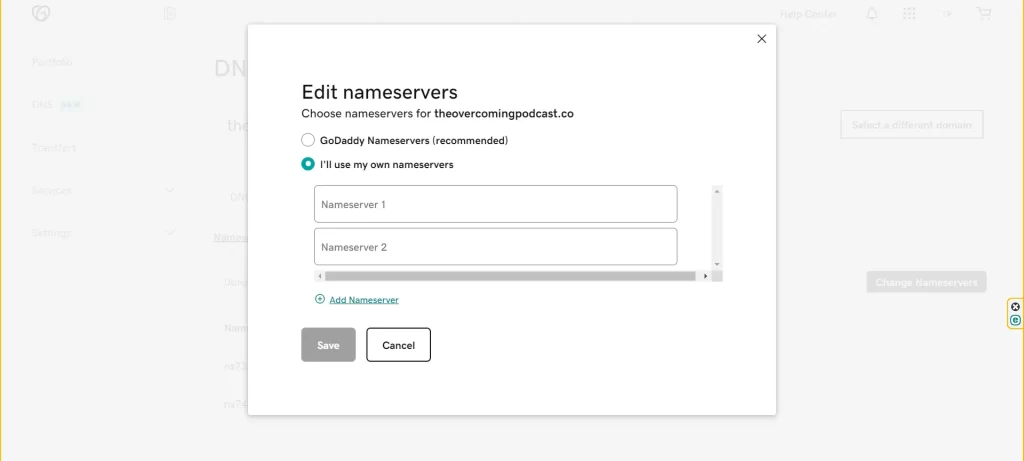
Now add the Golden Arts Nameservers as shown below:
ns224.cloudwebhosting.com
ns225.cloudwebhosting.com
ns224.cloudwebhosting.com (goes on the first line) and ns225.cloudwebhosting.com (goes on the second line).
Lastly, click Save.
Step 3
That’s it, after replacing the nameservers it will take anywhere between 24 to 48 hours to propagate the changes globally.
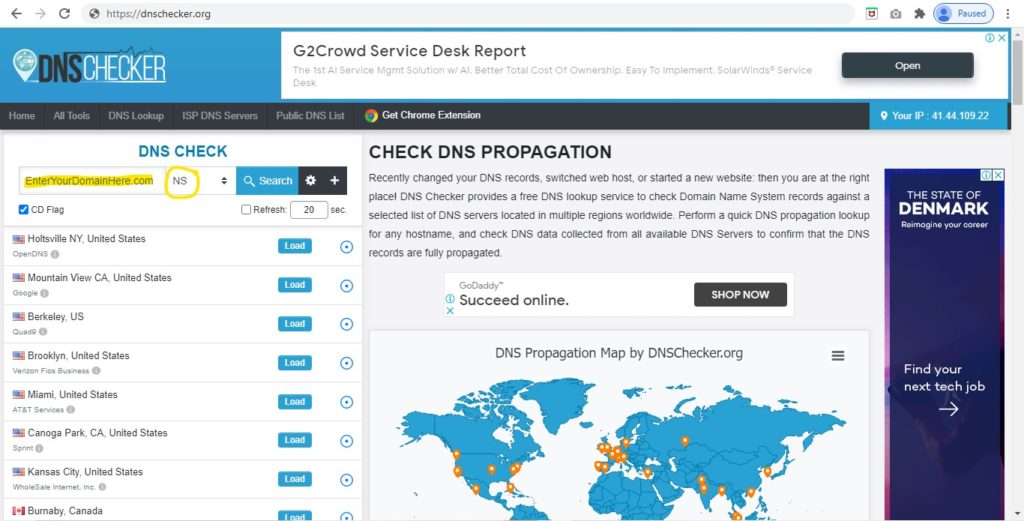
To double check your work you can visit DnsChecker.org (see screen shot below).
Then enter your domain as displayed below. Also make sure NS (Nameserver) is selected.
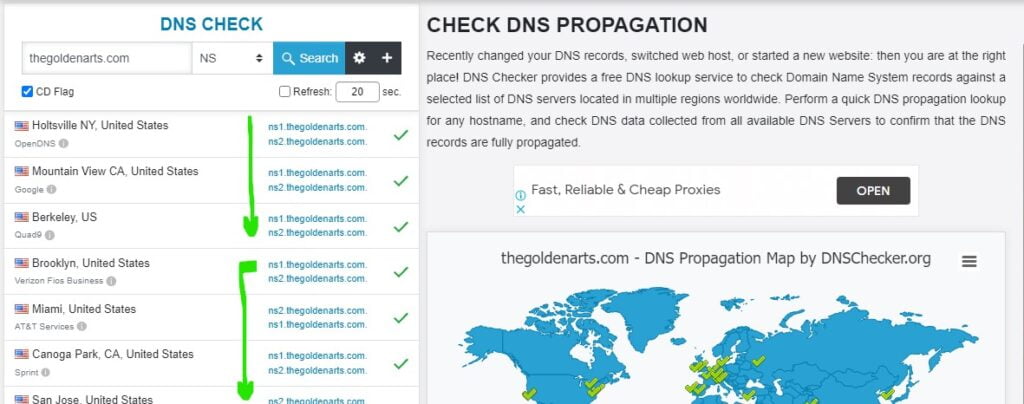
If you check back after awhile you’ll see that your NameServers are updated to The Golden Hosting. (See Below). As a reminder this can take sometime so be patient if you don’t see immediate changes.
Once completed, (if you’re a web design client of ours) you can write us and let us know so that we can apply your hosting and design bundle discount to our web design service.


